Scania T144 Heavy Metal
Scania T144 Heavy Metal
Het Project
The Project
Het begon allemaal begin 2008 toen ik een idee in mijn hoofd kreeg voor het bouwen van een Scania 4 serie Torpedo. Hiervoor heb ik toen de resin Torpedo neus van JCL gekocht met de Scania Dragon met Koeloplegger gekocht. Dit was toen de enigste doos die beschikbaar was met een Lowline dak.
It all started in early 2008 when I had the idea to build a Scania 4 Series Torpedo. I bought the resin Torpedo nose from JCL and the Scania Dragon with refrigerated trailer. At the time, this was the only kit available with a Lowline roof.


Het Bouw Proces
The Construction Process
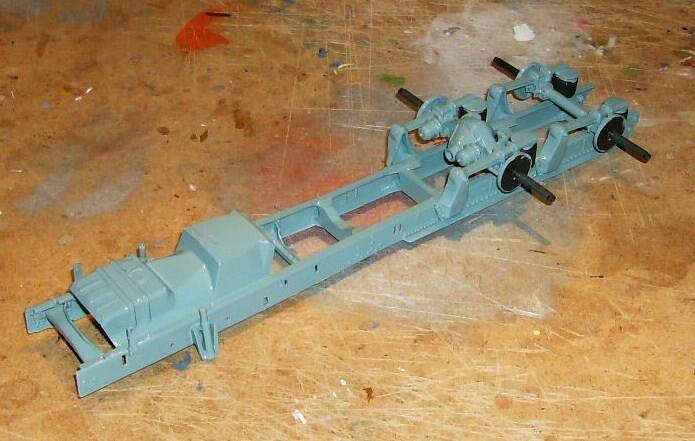
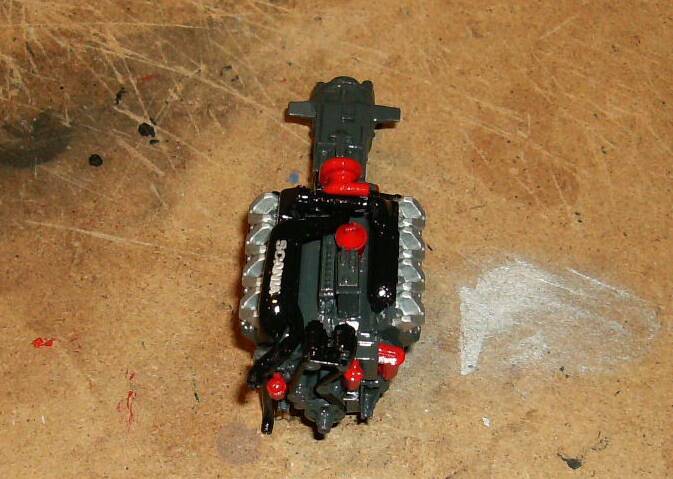
Het Chassis en Motor
The Chassis and Engine
Het chassis heb ik verlengt door er een achteras bij achter te zetten. Wat het chassis op de juiste lengte gaf.
Verder heb ik de sleepas aangepast door de luchtvering omhoog te zetten door de luchtbalgen in te korten omdat ik een liftas wauw hebben en van de as heb is het cardan er tussen weg gehaald
Tevens heb ik de gaten van de spatborden dicht gemaakt omdat ik er Custom spatborden op wauw maken.
Verder is er ook een achterbumper van JCL gebruikt.
I lengthened the chassis by adding a rear axle, which gave the chassis the correct length.
Also I modified the trailing axle by raising the air suspension by shortening the air springs because I have a lift axle. The drive shaft between the axle and the axle was removed.
I also filled in the fender holes because I'm going to install custom fenders. I used Humbrol paint for this model.


De Brandstoftanks
The Fuel Tanks
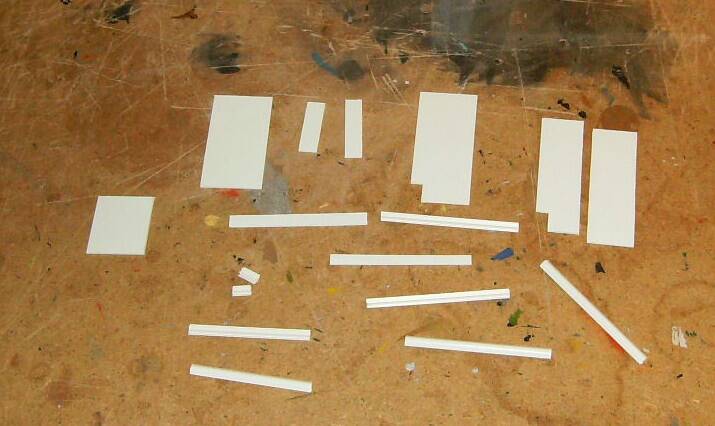
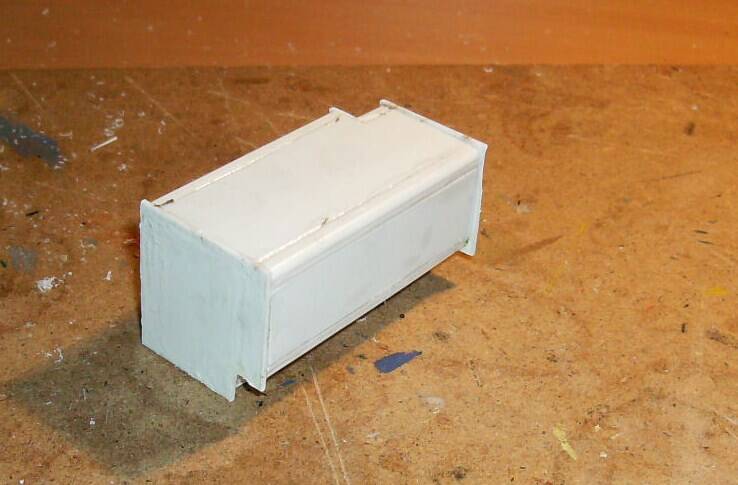
Met behulp van Evergreen strips en plaatmateriaal zijn de beide Tanks gemaakt.
Ik heb hiervoor kwartronde hoekjes gebruikt waar je 1 mm plaat in kunt stoppen waardoor de tanks op de hoeken een mooie strakke ronding kregen
Ik heb hier 0,5 mm plaat op gelijmd om het vlak te krijgen met de kwart rondjes waarna ik de tanks alleen nog maar glad hoefde te schuren af te werken.
De inkeping aan de achterkant is voor de ophanging van de achteras en die aan de onderkant voor de sidepipe.
Both tanks were made using Evergreen strips and sheet material.
I used quarter-round corners, which hold 1mm sheet metal, giving the tanks a nice, clean curve at the corners.
I glued 0.5mm sheet plate on top to ensure a flush fit with the quarter-round corners afterward,
I simply sanded the tanks smooth and finished them.
The notch at the back is for the rear axle mount, and the one at the bottom is for the sidepipe.


Achter Spatborden
Rear Mudguards
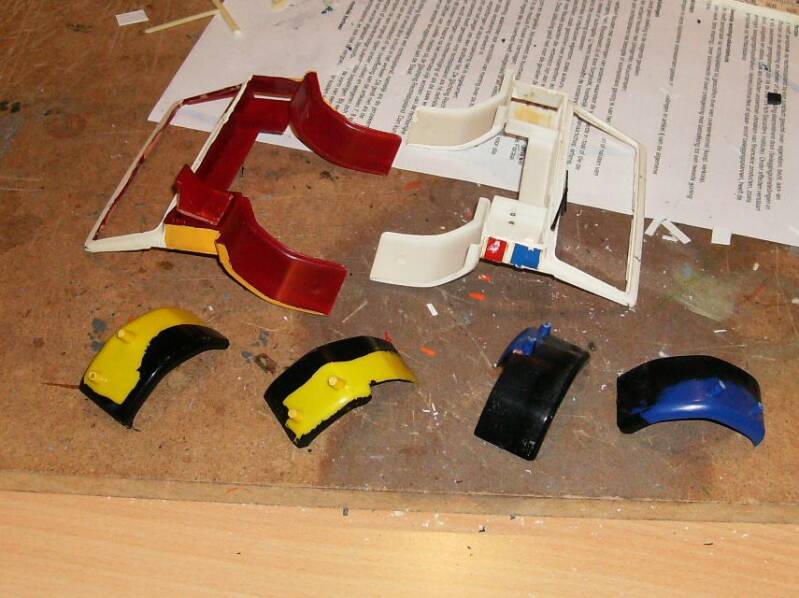
Voor de achter spatborden was mijn oog gevallen op de voor spatborden van de 3 serie Torpedo omdat deze een mooie hoekige vorm hebben. Ik heb voor de spatborden in totaal 16 spatborden gebruikt. Dezen door gezaagd en daarnaar per spatbord 4 stukken gebruikt om één te maken.
For the rear fenders, my eye was drawn to the front fenders of the 3 Series Torpedo because they have a nice angular shape. I used a total of 16 fenders for the fenders. I sawed these through and then used 4 pieces per fender to make one.


Bumper met Spatborden
Bumper with Mudguards
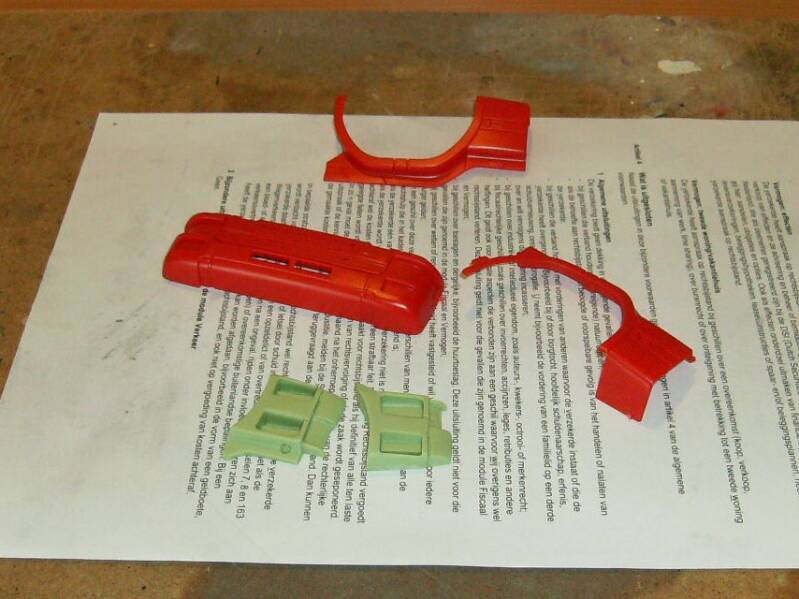
Bij het setje van JCL voor de Torpedo zitten ook 2 deeltjes voor de open opstapjes voor de vooras. Maar dat paste niet helemaal dus ik ben maar heen gegaan en heb ze uitgesneden uit de orginele Italeri en met 0,5 mm plaatmateriaal er zelf opstapjes in gemaakt.
The JCL set for the Torpedo also includes two pieces for the open steps for the front axle. But they didn't quite fit, so I went ahead and cut them out of the original Italeri and made my own steps from 0.5mm sheet metal.

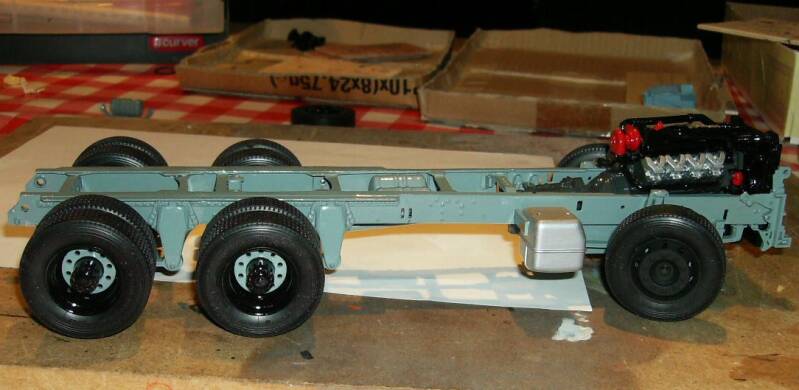
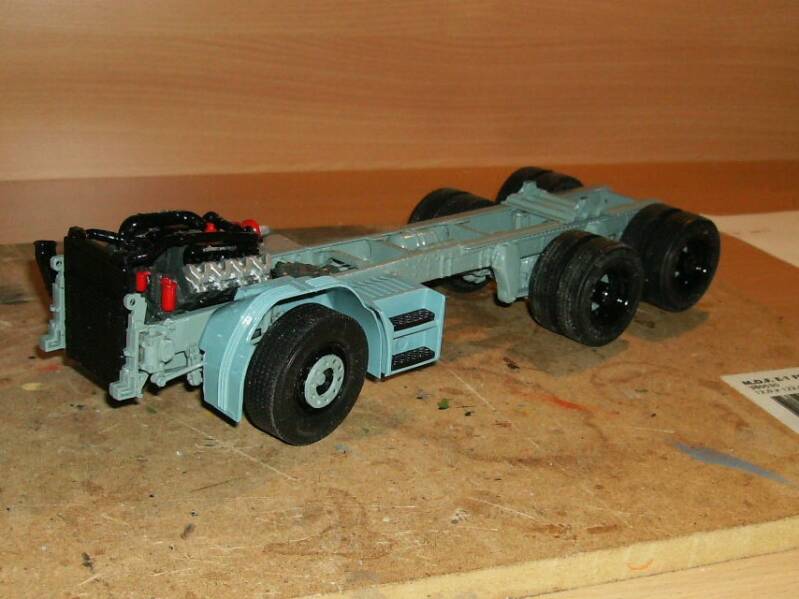
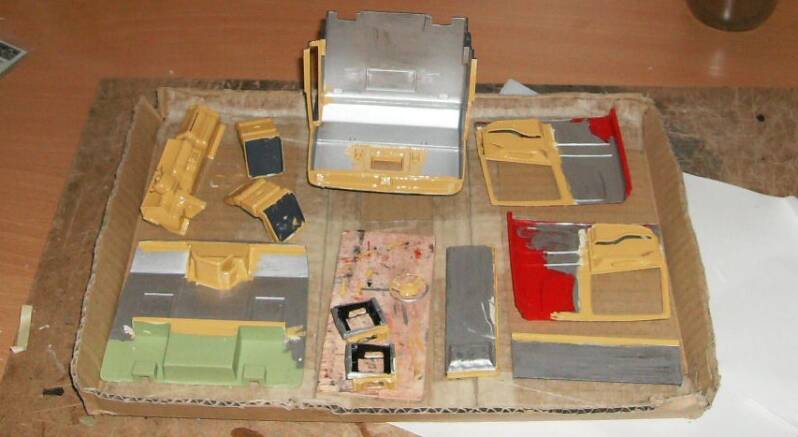
Voltooiing van het Chassis
Completion of the Chassis
Nu was het tijd om alles te passen om te kijken het ook goed paste en vervolgens alles in de kleur te zetten en het chassis af te bouwen.
Now it was time to try everything on to see if it fit well and then paint everything and finish the chassis.


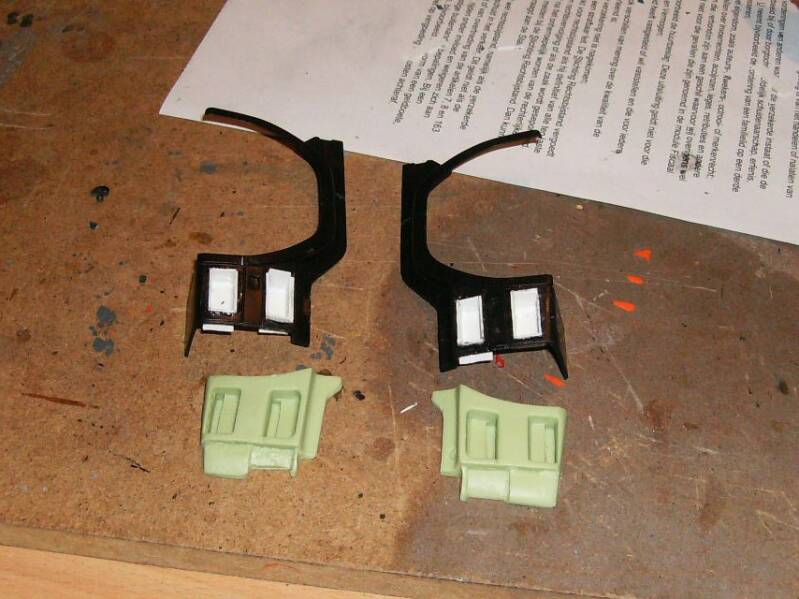
De Cabine
The Cab
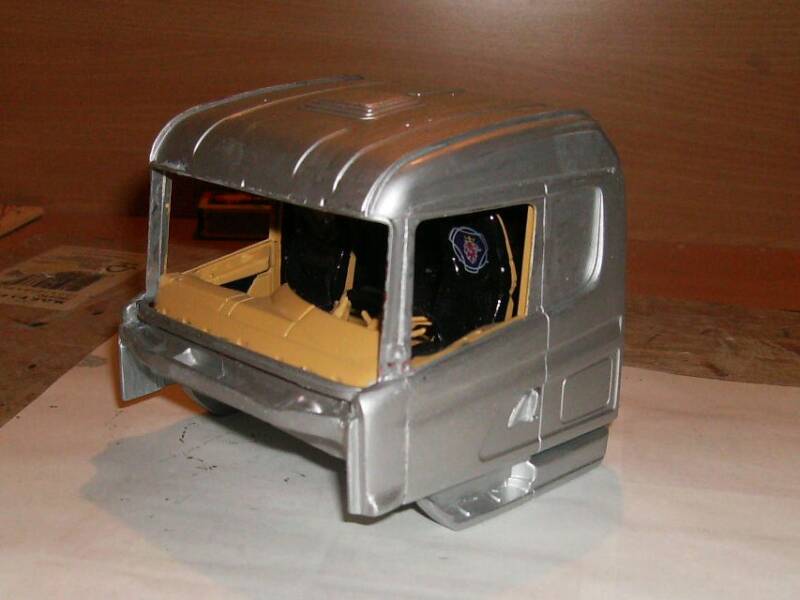
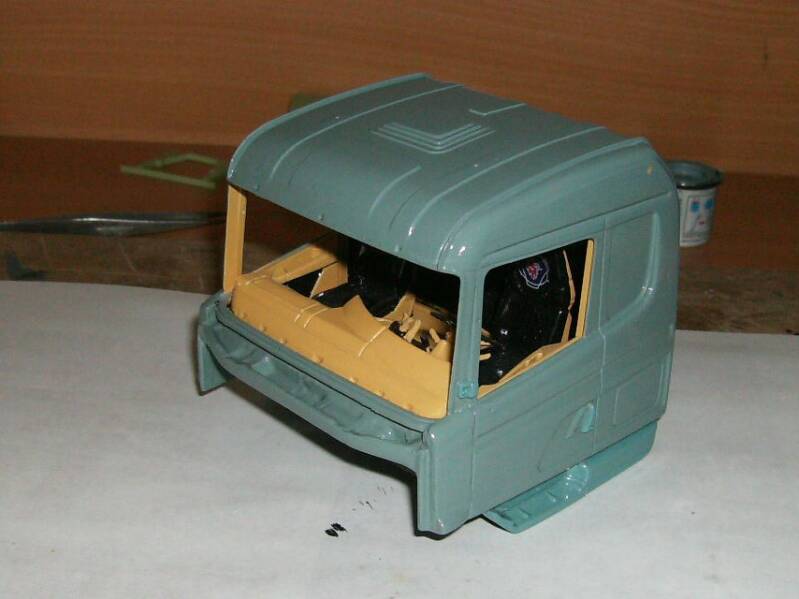
Opbouw van de Cabine
Construction of the Cabin
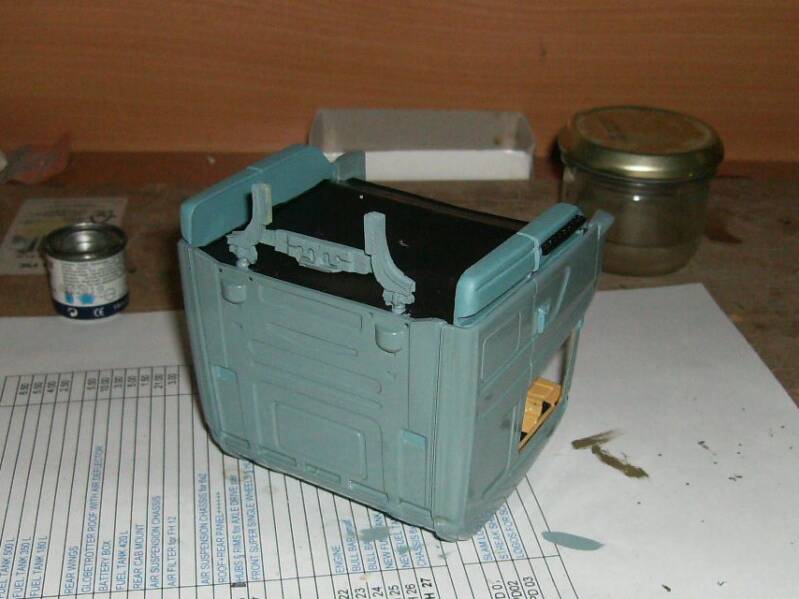
De volgende stap was het bouwen van de Cabine. In die tijd gebruikte ik geen primer maar zilver grijs als grondlaag omdat dit verf alle onderliggende kleuren neutraliseerde en een beetje stroef is waardoor de hoofdverf een goeie hechting had.
Voor de binnenkant van de cabine heb ik gekozen voor zwart en een zandkleurige verf wat mooi afsteekt bij het blauw achtige kleur van de cabine.
Daarna was het zaak om alles in elkaar te lijken en de buitenkant van de cabine in kleur te zetten
The next step was building the cabin. At that time, I didn't use a primer, but silver gray as a base coat because this paint neutralized all the underlying colors and was a bit rough, allowing the main paint to adhere well.
For the interior of the cabin, I chose black and a sand-colored paint, which contrasts nicely with the blueish color of the cabin.
Then it was time to put everything together and paint the exterior of the cabin.


Huwelijk tussen Chassis en Cabine
The marriage of Chassis and Cab
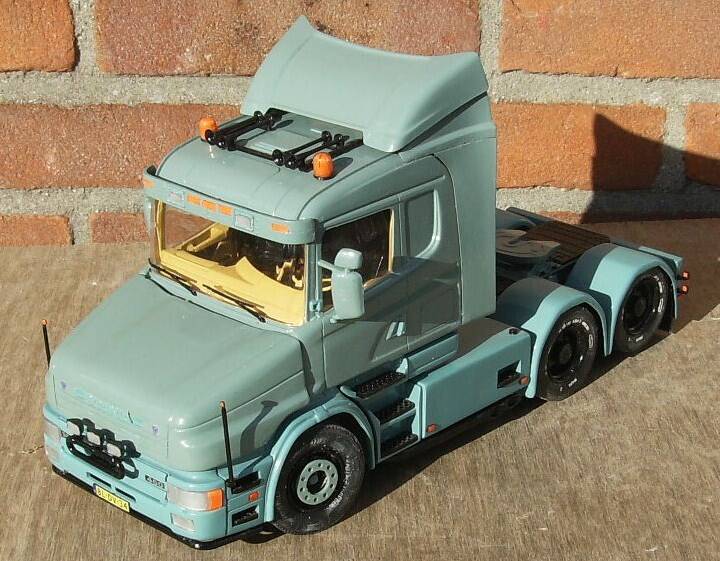
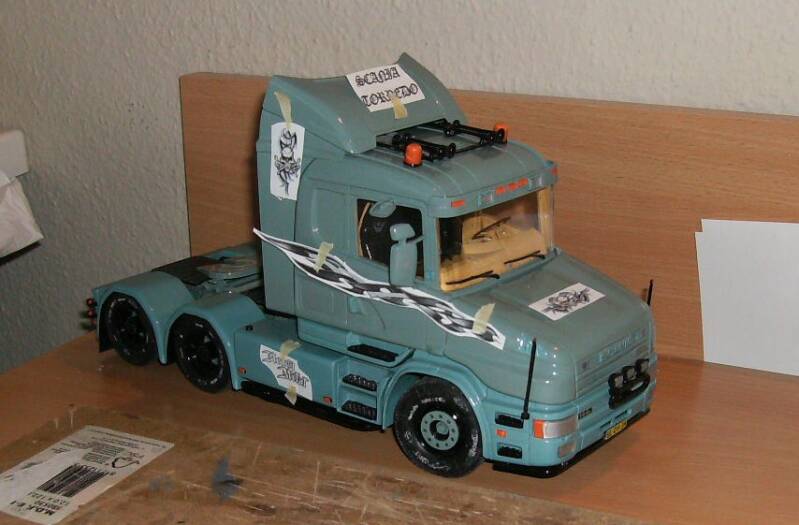
Nadat de cabine af was kon deze op het chassis geplaatst worden en alle onderdelen gemonteerd worden waarna het model klaar was.
After the cabin was finished it could be placed on the chassis and all the parts could be mounted after which the model was ready.


Foto's Eind Resultaat
Photos Final Result


Op de onderstaande link kom je op de pagina in het Modelbrouwers Forum terecht waar ik destijds een bouwverslag over dit project begonnen ben.
The link below will take you to the page in the Model Brewers Forum where I started a construction report about this project.
Maak jouw eigen website met JouwWeb