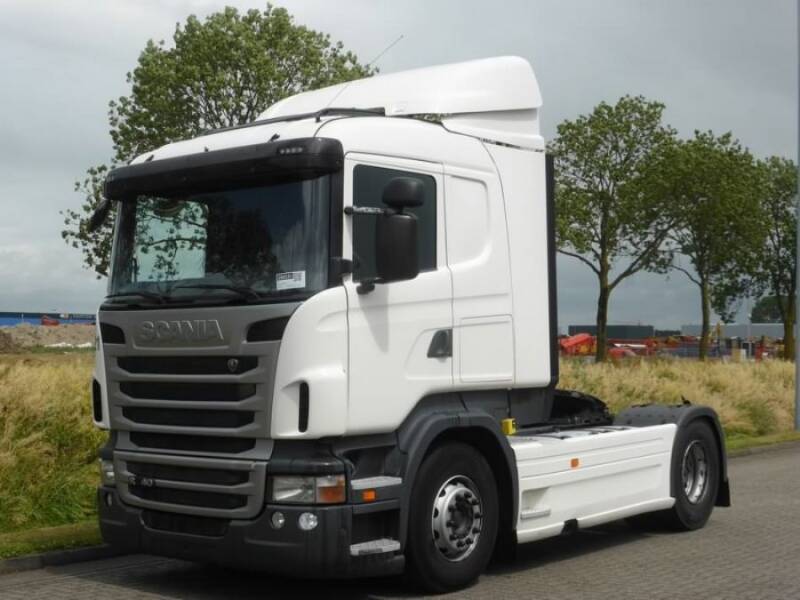
Scania R2 Lowline 2009-2013 Facelift 4x2 Trekker
Scania R2 Lowline 2009-2013 Facelift 4x2 Tractor
Het Project
The Project
Om dit model te bouwen ben je meerdere Scania kits van Italeri nodig.
Je bent de Scania R144 Heavy Truck Italeri Doos 743 uit 1997-2002 en Scania R620 "Dark Diamond" Italeri 3858 2010- Heden of een van de andere Dozen met een R2 gril.
De foto's hier onder dienden als inspiratie voor deze bouw.
To build this model you will need several Scania kits from Italeri.
You need the Scania R144 Heavy Truck Italeri Box 743 from 1997-2002 and Scania R620 "Dark Diamond" Italeri 3858 2010- Present or one of the other Boxes with an R2 grille.
The pictures below served as inspiration for this build.


Het Bouw Proces
The Construction Process
De Cabine
The Cab
Om deze R2 correct te bouwen ben je veel Resin Aftermarket onderdelen nodig.
Het interieur is namelijk (zoals iedereen die Scania's bouwt wel weet) grotendeels gewoon overgenomen van de Scania 4 serie. Dus voor dit model de nodige Resin Aftermarket onderdelen aangeschaft.
De onderdelen voor de binnenkant van de cabine waren de Stoelen met deurpanelen TQ 82 Scania Interior set van KFS uit Engeland en het correct dashboard van HA Models uit Denemarken gebruikt.
To build this R2 correctly, you'll need a lot of resin aftermarket parts.
The interior (as anyone who builds Scanias knows) is largely taken from the Scania 4 series, so the necessary resin aftermarket parts were purchased for this model.
The parts for the cabin interior were the TQ 82 Scania Interior seats with door panels from KFS in England, and the correct dashboard from HA Models in Denmark.


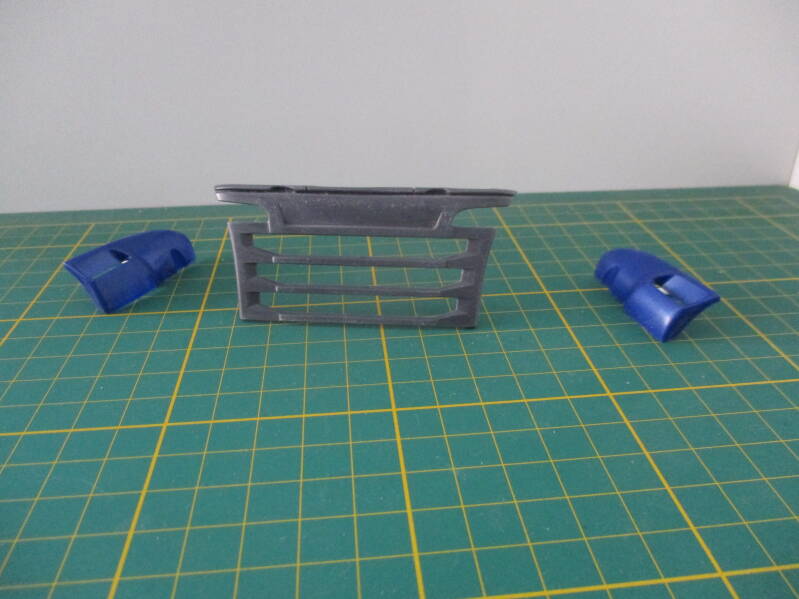
Voor de gril heb ik de CTM set 24038 (die je op de foto kunt zien) gebruikt. Daarvoor heb ik de gegoten grildelen van Italeri uitgesneden en de CTM delen in vorm gebogen zodat ze in de Gril passen
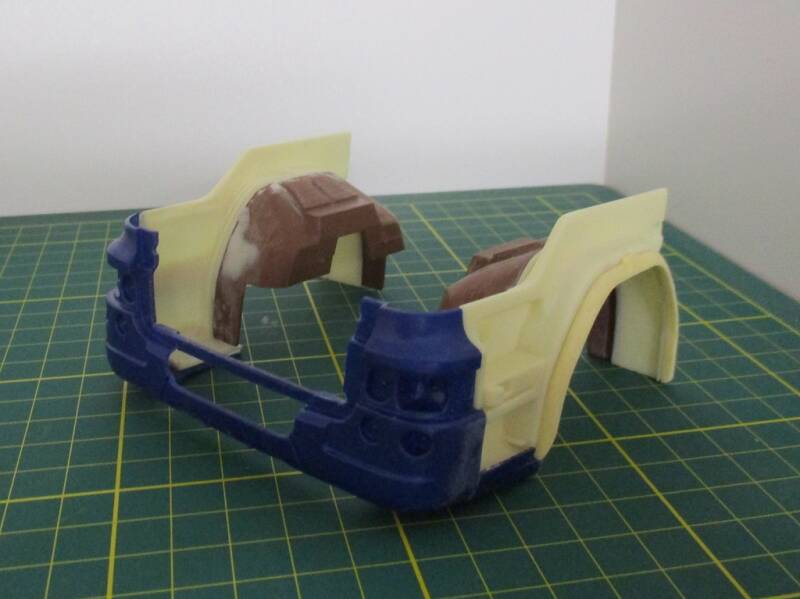
De Vooras Spatborden komen van MG Modeling uit Engeland
For the grille, I used CTM set 24038 (which you can see in the photo). I cut out the cast grille parts from Italeri and bent the CTM parts to fit the grille.
The front fenders are from MG Modeling in England.
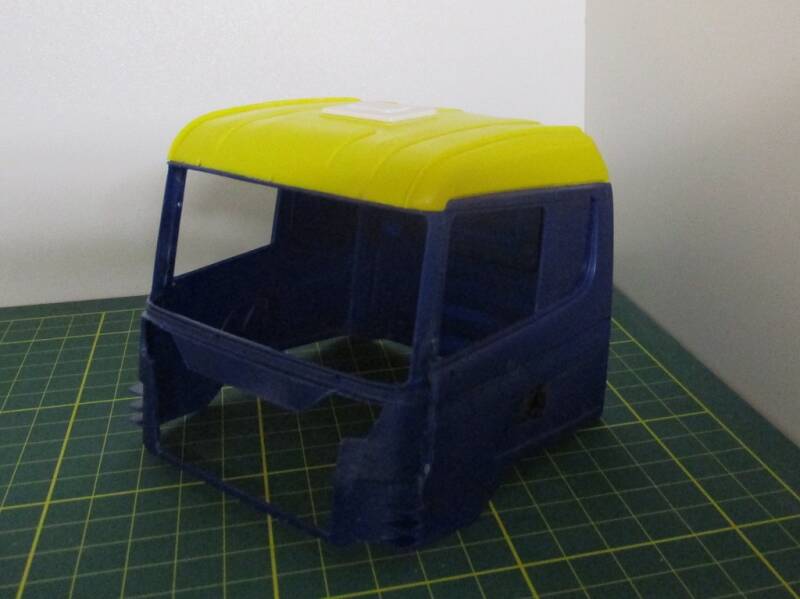


Verder heb ik de Scania zonneklep TQ 92 van KFS uit Engeland gebruikt die correct is voor een Lowline dak.
Maar ik heb de onderkant weg gehaald zodat ik het transparante deel van Italeri kan gebruiken.
I also used the Scania TQ 92 sun visor from KFS in England, which is the correct size for a Lowline roof. However,
But I removed the bottom edge so I could use the transparent part from Italeri.

De bestuurdersdeur die ik uit heb gesneden en aan de binnenkant voorzien van de deurpaneel voor en R1 en deze verbouwd naar die van een R2 incl het zonnescherm aan de bovenkant van het raam.
Verder ook de bovenste opstap onder de vloerplaat gebouwd met behulp van een PE opstap uit de CTM cabine set.
Ook heb ik het onderbed verhoogd en de klep voor de koelkast na gebouwd.
I cut out the driver's door and on the inside fitted it with the insite door panel from the R1, and converted it to that of an R2, including the sunshade at the top of the window.
I also built the upper step under the floor pan using a PE step from the CTM cabin set.
I also raised the bottom bed and also I built the refrigerator door.


Het Dashboard het ik als voorbeeld gebruikt voor het aanpassen van het Italeri R1 dashboard. Van de tunnel opbergbak onder het dashboard heb ik een Resin kopie gegoten in een Siliconen mal en deze gebruikt voor dit model.
De binnenkant van het dakhemel heb ik aangepast door er het boven consul van de R serie er in te bouwen.
Voor een correct linker achterhoek van de binnen cabine had ik een keer een mal gemaakt van binnenhoek van JCL België en heb ik daarmee een binnenhoek gegoten om te gebruiken.
I used the dashboard as a model for modifying the Italeri R1 dashboard. I cast a resin copy of the tunnel storage box under the dashboard in a silicone mold and used it for this model.
I modified the inside of the headliner by incorporating the R-series upper console.
For a correct left rear corner of the interior cabin, I once made a mold of an inner corner from JCL Belgium and cast an inner corner for use with it.


De cabine zijspoilers heb ik voorzien van de kunststof verlengers zoals op de voorbeeld foto.
I fitted the cabin side spoilers with plastic extensions as shown in the example photo.

Het Chassis
The Chassis
Wat voor de cabine geld, geld ook voor het chassis,
Het chassis is voor 100% overgenomen van de 4 serie en daardoor heb ik het Euro 5 AdBleu uitlaat systeem TQ 95, de Accubak TQ 129, de Scania Naven met schijfremmen TQH10a van KFS uit Engeland, de Achteras Ophanging van P&B Models uit Polen, en voor de motor juiste Cilinder Koppen van JCL uit België aan moeten schaffen om een correct chassis te krijgen.
Het reservewielhouder gebruikt van de CTM set 24034 Scania 4&R series chassis parts.
Bij de Vooras Spatborden van MG Modeling uit Engeland zaten ook de juiste Cabine Steunen.
What applies to the cab also applies to the chassis.
The chassis is 100% derived from the 4 series, so I had to purchase the Euro 5 AdBlue exhaust system TQ 95, the battery box TQ 129, the Scania hubs with disc brakes TQH 10a from KFS in England, the rear axle suspension from P&B Models in Poland, and the correct cylinder heads for the engine from JCL in Belgium to obtain a correct chassis.
I also used the spare wheel holder from the CTM set 24034 Scania 4&R series chassis parts.
The front axle mudguards from MG Modeling in England also included the correct cab supports.


Om de sideskirts aan de spatborden te bevestigen heb ik hiervoor het ophang systeem nagebouwd zoals het er bij de echte R er ook uitziet.
De sideskirts zelf heb ik aan de voorkant aangepast omdat naar mijn mening de ronding niet mooi gelijk is aan die van de spatborden van de vooras.
To attach the side skirts to the fenders, I recreated the mounting system to match the design of the real R.
I modified the side skirts themselves at the front because, in my opinion, the curvature isn't quite the same as that of the fenders on the front axle.


Voor het motorblok heb ik dus de correcte Cilinderkoppen van JCL Belgie gebruikt.
For the engine block I used the correct cylinder heads from JCL Belgium.

Dingen die ik verder zelf gedaan heb zijn het verbouwen van de slangenrek, beugels voor de dekplaten boven de accubak en uitlaatfilter, Tanksteunen, ruitenvloeistof houder en lasnaden van de CTM set 24127 Weld Lines op de tank en luchtketels.
Other things I did myself were building the hose rack, bracketed for the cover plates above the battery box and exhaust filter, tank supports, windshield washer fluid holder and welds from the CTM set 24127 Weld Lines on the tank and air tanks.


Om de hoogte verschil op te lossen heb ik een evergreen strip van 2 mm over de spatborden gelijmd zodat je de juiste hoogte krijgt en er geen naad tussen de bumper en de cabine zit.
To solve the height difference, I glued a 2mm evergreen strip over the fenders so that you get the correct height and there is no seam between the bumper and the cabin.

Verven
Painting
Daarna was het tijd om alle onderdelen in de verf te gaan zetten. Ik heb hiervoor Humbrol verf gebruikt en de Airbrush
De eerste stap was om alles in de primer te spuiten en vervolgen de onderdelen de juiste kleur te geven.
Then it was time to start painting all the parts. I used Humbrol paint for this and the Airbrush.
The first step was to spray everything with primer and then paint the parts the correct color.


Uiteindelijk dit model dus nooit afgebouwd, de reden weet ik niet meer precies. Het chassis licht nu in de voorraad bak en de overige Resin delen zijn verdeeld over andere bouwdozen.
Ultimately, I never finished this model; I don't remember exactly why. The chassis is now in the storage bin, and the remaining resin parts are spread across other kits.
Op de onderstaande link kom je op de pagina in het Modelbrouwers Forum terecht waar ik destijds een bouwverslag over dit project begonnen ben.
The link below will take you to the page in the Model Brewers Forum where I started a construction report about this project.
Maak jouw eigen website met JouwWeb